Hence, putting your number on Instagram can help strengthen the shelter of your account. Besides, it contributes to the reliability of a professional account on Instagram. This article will cover a comprehensive tutorial showing you how to put your number on Instagram. Without further ado, let’s get started!
Log In or Sign Up for Instagram
To begin with, you’ll need to log in to Instagram. In case you haven’t had an account yet, don’t worry. We’ll provide you with a quick tutorial showing how to sign up for a new account on this platform in the following paragraphs. Instagram is available on iOS and Android; hence, you can download it to the App Store or Google Play. Then, open the app and select “Sign up” to continue. One way to join Instagram is by providing your phone number or email address. Another way is connecting your Facebook account with Instagram. The second option is more time-saving as Instagram will automatically synchronize your details. Hence, you don’t need to fulfill the information all over again. After that, Instagram will ask you to verify your account by entering the code sent to your phone number. Don’t forget to provide your username, birthday, and password, and you’re done creating a new account on Instagram.
Put Your Number on a Personal Account
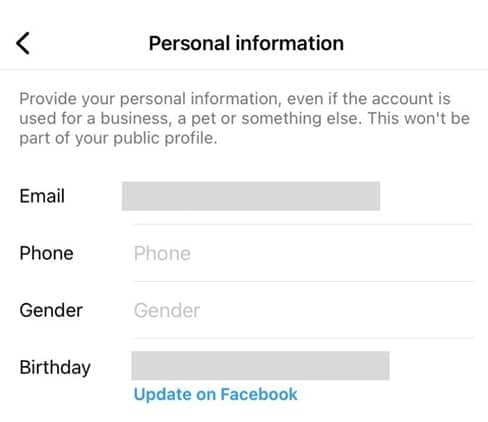
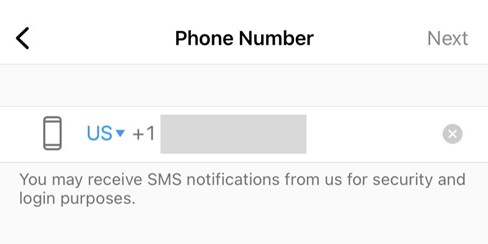
Instagram will set your account status as “personal” by default, and you can change this setting anytime you wish. To put your number on this type of account, you need to find the “Edit profile” section. From your Instagram Homepage, tap on the profile picture at the bottom-right corner of the screen. Then, you’ll see your own Instagram feed and select the “Edit Profile” button to continue. In the “Edit profile” section, please press Personal information settings, and here, you’re able to edit Email, Phone, Gender, and Birthday as follows: Then, select Phone and enter your number here. After that, hit Next, and all changes are saved. Instagram will send a notification to your email so that you can track all the activities.
Add the Contact Number to Your Professional Account
If you’re a social media lover, you probably know that Instagram’s biggest plus is the ability to boost your posts’ visibility in front of more followers. Hence, many of you may want to have a Professional account on Instagram to build customer awareness. So, we’ll show you how to switch your account status first. After accessing the Edit profile section, tap Switch to Professional Account. By doing this, you’ll benefit from:
Free access to followers and account performance insights.The “Promote” feature advertises and boosts your posts’ visibility.More contact options are available.
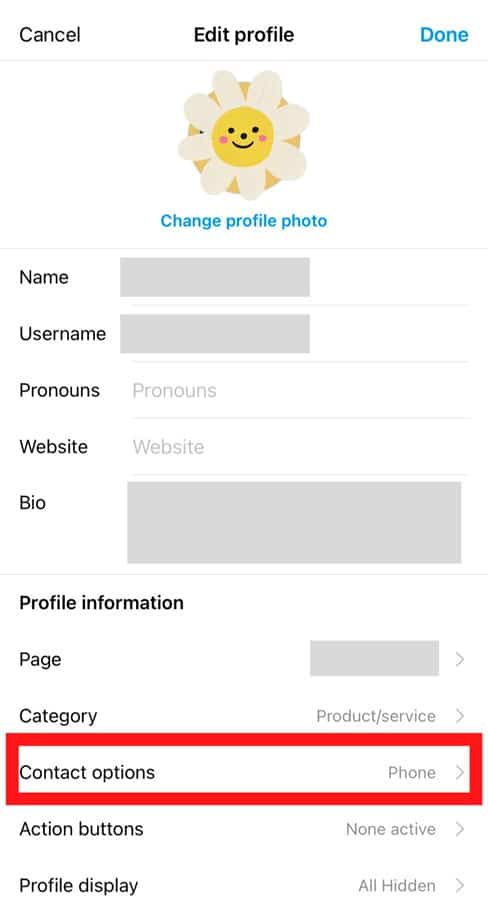
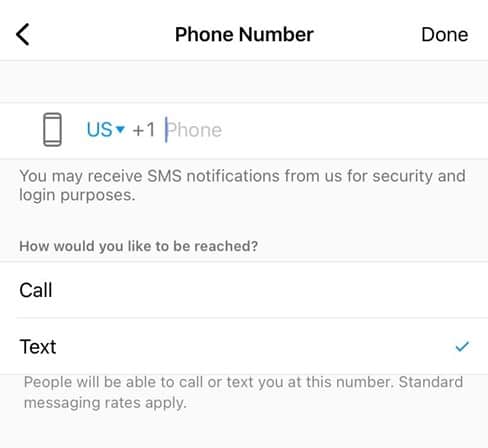
Then, it’s time to pick a category that best describes your account. You can choose from the categories that Instagram suggests or use the search bar to find the most suitable one. Once selected, hit Done, and your account is successfully switched into a Professional one. This means that your account is in the public mode, and every user on Instagram can view all your posts. To put your number on a Professional Instagram account, you’ll need to find the Contact options section. Select Edit Profile next to the “Ad Tools” and “Insights” buttons from your Profile page. Then, Instagram will redirect you to a new screen displaying your Name, Username, Website, etc. All you need to do is look at the “Profile information” section and tap on the Contact options to continue. Then, select the Business phone number in the Public Information section and enter your number here. Put a tick on “Call” or “Text” depending on how you would like to be reached. After that, hit Done to save.
Conclusion
Voila! Your phone number is successfully added to your Instagram account. We hope that this article can come as a quick answer to your question. If you’re looking for more social media tips and tricks, don’t look further as you’re in the right place. Keep following us, and we promise that you will never disappoint with what we bring to the table!


